|
Size: 4586
Comment:
|
← Revision 138 as of 2015-04-26 19:16:13 ⇥
Size: 6139
Comment:
|
| Deletions are marked like this. | Additions are marked like this. |
| Line 1: | Line 1: |
| ## page was renamed from DieMenschMaschine | [[fungi|{{attachment:8BitFungi.png|Fungi From Yuggoth|align="right"}}]] |
| Line 3: | Line 3: |
| [[http://en.wikipedia.org/wiki/Kraftwerk|Kraftwerk]], [[http://en.wikipedia.org/wiki/The_Man-Machine|The Man-Machine]], 1978 | [[http://en.wikipedia.org/wiki/Kraftwerk|Kraftwerk]], [[http://en.wikipedia.org/wiki/The_Man-Machine|The Man-Machine]] (1978) |
| Line 7: | Line 7: |
| = Septabmic Chording Keyers = Inspired by Greg Priest-Dorman's [[http://chorder.cs.vassar.edu/|Chorder]] wiki, I'm building a handheld [[https://en.wikipedia.org/wiki/Chorded_keyboard|chorded keyboard]] based on [[http://symlink.dk/projects/spiffchorder/|Spaceman Spiff's Chording Keyboard Experiment (SpiffChorder)]] with some earlier influence from Steve Mann's [[http://wearcam.org/septambic/|septambic keyer]]. Photos and designs published in this section are licensed under the terms of the [[http://www.gnu.org/copyleft/gpl.html|GPL (3.0)]], same as the !SpiffChorder project itself (since they could be considered derivative works). |
[[attachment:ManMachine.jpg|{{attachment:ManMachineTeaser.jpg|wearable fungi}}]] |
| Line 10: | Line 9: |
| I started on a solderless breadboard, shown here, but those really aren't suited for higher-frequency prototyping and so I was getting stray USB device resets at random (particularly if I inadvertently brushed the ground line while not grounding myself first). I used the components in GPD's Digikey bill of materials, going with the 8x pull-up resistor SIP array since I was only testing with 7 keys. I also chose poorly on a preformed bank of 3 yellow LEDs which were somewhat larger than I intended and the leads weren't quite a multiple of 0.1" standard breadboard pitch. I used Adafruit's excellent [[http://www.adafruit.com/products/601|AVR ATmegaXX8 Pinout Stickers]] to more easily keep track of what I was connecting. | <<TableOfContents>> |
| Line 12: | Line 11: |
| [[attachment:SpiffChorderBreadboard.png|{{attachment:SpiffChorderBreadboard.png|SpiffChorder breadboard}}]] | = One-Handed Text Input = Have you ever wished you could graft a text input device directly onto your arm? Well, this is about as close as it gets without surgery... Inspired by Greg Priest-Dorman's [[http://chorder.cs.vassar.edu/|Chorder]] wiki, I'm using a handheld [[https://en.wikipedia.org/wiki/Chorded_keyboard|chorded keyboard]] based on [[http://symlink.dk/projects/spiffchorder/|Spaceman Spiff's Chording Keyboard Experiment (SpiffChorder)]] with some earlier influence from Steve Mann's [[http://wearcam.org/septambic/|septambic keyer]]. The subpages linked below provide explicit documentation of my efforts and, in combination with the excellent instructions on Greg's and Spiff's sites, should be more than sufficient for creating one of your own. Photos and designs published in this section are licensed under the terms of the [[http://www.gnu.org/copyleft/gpl.html|GPL (3.0)]], same as the !SpiffChorder project itself (since they could be considered derivative works). |
| Line 14: | Line 14: |
| In an effort no to limit my capabilities with the keyer's software, I wanted to make sure whatever prototype I eventually built could double as a development board. To that end, I implemented all optional components of the !SpiffChorder circuit (programming header, LEDs, pull-up resistors and screw terminals for all 8 chord keys and 3 modifier keys). I tried to keep the layout as compact as possible while still working on single-sided pad-per-hole perfboard, using entirely right-angle traces so as not to make stray contact with corners of square pads. It fits in a 17x21 hole grid including a ground bus all the way around the perimeter. Here's a top-down view showing the logical supply, ground and signal paths colored for easy identification: | [[/KeyerChords|{{attachment:ChordsTeaser.png|A text-terminal-friendly "modified NASA" chordset reference chart...}}]] [[/KeyerBreadboard|{{attachment:SpiffChorderBreadboardTeaser.jpg|Prototyping a SpiffChorder on a solderless breadboard...}}]] [[/KeyerPerfboard|{{attachment:SpiffChorderPerfboardCircuitTeaser.png|Building a SpiffChorder on perfboard...}}]] [[/KeyerPerfboard|{{attachment:SpiffChorderPerfboardFrontTeaser.png|Building a SpiffChorder on perfboard...}}]] [[/KeyerPCB|{{attachment:SpiffChorderSchematicTeaser.png|Designs for a SpiffChorder printed circuit board...}}]] [[/KeyerPCB|{{attachment:SpiffChorderPaperTestTeaser.jpg|Designs for a SpiffChorder printed circuit board...}}]] [[/KeyerHandset|{{attachment:SpiffChorderHousingInsideTeaser.jpg|Making your own SpiffChorder handset...}}]] [[/KeyerHandset|{{attachment:SpiffChorderHousingAssembledStrapTeaser.jpg|Making your own SpiffChorder handset...}}]] |
| Line 16: | Line 23: |
| [[attachment:SpiffChorderPerfboardCircuit690x825.png|{{attachment:SpiffChorderPerfboardCircuit251x300.png|SpiffChorder perfboard circuit}}]] | * [[/KeyerChords|A text-terminal-friendly "modified NASA" chordset reference chart...]] * [[/KeyerProgramming|Installing the SpiffChorder firmware onto an ATmega168 microcontroller from Linux...]] * [[/KeyerBreadboard|Prototyping a SpiffChorder on a solderless breadboard...]] * [[/KeyerPerfboard|Building a SpiffChorder on perfboard...]] * [[/KeyerPCB|Designs for a SpiffChorder printed circuit board...]] * [[/KeyerHandset|Making your own SpiffChorder handset...]] |
| Line 18: | Line 30: |
| This is the front showing just silkscreen markings and jumpers, as well as the traces on the back (mirrored for easier visual reference): | = Head-Mounted Display = This has traditionally been the most expensive and annoying component plaguing wearable computing enthusiasts, and I expect that will continue for some time to come (though I'm trying to stay open-minded about upcoming technologies like Google Glass and Lumus Optical). The optics and display density needed for typical computing on a [[http://en.wikipedia.org/wiki/Head-mounted_display|HMD]] are still not available on the consumer market. Luckily for me, since I spend most of my time using text displays I'm able to get by with a relatively low-resolution solution. At first I wanted a monocular display as a matter of convenience and simplicity, but after reading up on [[http://en.wikipedia.org/wiki/Binocular_rivalry|binocular rivalry]] I'm now starting to suspect there are neurological/cognitive reasons it would be less efficient. |
| Line 20: | Line 33: |
| [[attachment:SpiffChorderPerfboardFront690x825.png|{{attachment:SpiffChorderPerfboardFront251x300.png|SpiffChorder perfboard front}}]] [[attachment:SpiffChorderPerfboardBack690x825.png|{{attachment:SpiffChorderPerfboardBack251x300.png|SpiffChorder perfboard back}}]] |
I've obtained a Vuzix Wrap 920 and Vuzix Wrap VGA Adapter (US$240 combined through Amazon) and removed the cosmetic sunglasses-style lenses to make the rig slightly less obtrusive. This device supports 640x480, 800x600 and 1024x768 resolutions (claimed via EDID on the VGA line) but the native resolution is closer to 640x480 so at first I thought I would stick with that. As it turns out, non-text applications like to make some assumptions about minimum screen geometry (for buttons and the like) which becomes problematic at such low resolutions. Instead, I've set my desktop environment for 1024x768 and increased font sizes where it makes sense to do so. |
| Line 23: | Line 35: |
| I was going to try laying this out with [[http://fritzing.org/|Fritzing]], but got sidetracked when I couldn't find a resistor array in its parts library. Instead I wound up just sketching the layout on graph paper and transferring it into [[https://live.gnome.org/Dia|Dia]] by hand. [[attachment:spiffchorder.dia|Here's the multi-layer original from which the above graphics were exported.]] The same pathing could be used for a custom double-sided PCB, which I'll probably get around to making at some point. | = Single-Board Wearable Computer = At the moment I've got a [[http://beagleboard.org/hardware-xM/|BeagleBoard-xM]] running [[http://wiki.debian.org/ArmHardFloatPort|Debian's armhf port]]. Since the video output is HDMI and there's no inexpensive HDMI-supporting HMD on the market yet (might trade up to a [[http://www.siliconmicrodisplay.com/|ST1080]] eventually), I'm using a High Resolution Video DVI to VGA Converter from !StarTech. I've read that a similar (and cheaper) converter from fit-PC2 will work but it requires [[http://blog.galemin.com/2011/03/dvi-d-to-vga-converter-for-beagleboard-xm/|modifying the BeagleBoard]] (which I'd like to avoid if I can). |
| Line 25: | Line 38: |
| = Monocular Headmount Displays = As I begin work on a wearable display, I'll flesh out this section. Here are some interesting links for components I'm considering: * http://wearcomp.wikia.com/wiki/Myvu_Crystal * http://blog.makezine.com/2009/03/17/myvu-crystal-as-a-wearable-hea/ * http://blog.makezine.com/2009/01/12/myvu-display-in-a-wearable-computer/ |
= Portable Power Supply and Charger = The single-board wearable is currently powered from an [[http://www.ianker.com/anker-astro-external-battery-backup-charger/product/79UN5V2-B16P100A|Anker Astro3]], but I may switch it to the lighter and slimmer [[http://www.ianker.com/anker-astro-external-battery-backup-charger/product/79ANS1052-BA|Astro 3E]] once I don't need as many outputs or as much current. I already had a bunch of suitable switching power supplies on hand (Asus ADP-36EH C, replacements are available for very low cost) so I merely fashioned an appropriate adapter cable to fit the input on the Anker. |
| Line 31: | Line 41: |
| = Single-Board Wearable Computers = Right now I just go everywhere with an [[http://eeepc.asus.com/|Asus Eee PC]] netbook running [[http://www.debian.org/|Debian GNU/Linux]], but intend to transition soon to a low-power single-board computer. Some links for reference: * http://beagleboard.org/ * http://www.raspberrypi.org/ * http://www.cs.vassar.edu/people/priestdo/wearables/top = Portable Power Supplies and Chargers = Portable power will also be critical: * http://www.sparkfun.com/products/8290 * http://www.adafruit.com/products/280 * http://www.adafruit.com/products/353 |
= Motion-Sensing Pointer = I don't really use a mouse much (I can usually get by with the [[http://www.semicomplete.com/projects/keynav/|keynav]] utility wherever pointer interaction is absolutely required), but there are times when having one would be useful. I'll probably build something USB-based with accelerometers, but might instead do something with a small trackball: * http://www.ladyada.net/make/usbgamepad/ * http://www.sparkfun.com/products/9320 |
Man Machine, pseudo human being; Man Machine, super human being.
Kraftwerk, The Man-Machine (1978)
Chronicling fungi's steady descent into cyberpsychosis....
Contents
One-Handed Text Input
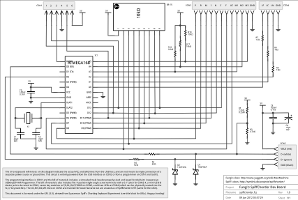
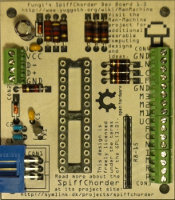
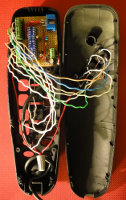
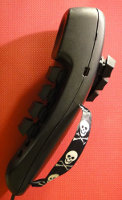
Have you ever wished you could graft a text input device directly onto your arm? Well, this is about as close as it gets without surgery... Inspired by Greg Priest-Dorman's Chorder wiki, I'm using a handheld chorded keyboard based on Spaceman Spiff's Chording Keyboard Experiment (SpiffChorder) with some earlier influence from Steve Mann's septambic keyer. The subpages linked below provide explicit documentation of my efforts and, in combination with the excellent instructions on Greg's and Spiff's sites, should be more than sufficient for creating one of your own. Photos and designs published in this section are licensed under the terms of the GPL (3.0), same as the SpiffChorder project itself (since they could be considered derivative works).
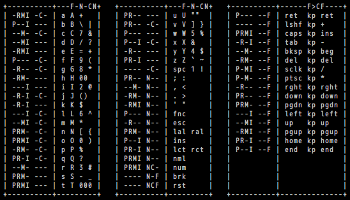
A text-terminal-friendly "modified NASA" chordset reference chart...
Installing the SpiffChorder firmware onto an ATmega168 microcontroller from Linux...
Head-Mounted Display
This has traditionally been the most expensive and annoying component plaguing wearable computing enthusiasts, and I expect that will continue for some time to come (though I'm trying to stay open-minded about upcoming technologies like Google Glass and Lumus Optical). The optics and display density needed for typical computing on a HMD are still not available on the consumer market. Luckily for me, since I spend most of my time using text displays I'm able to get by with a relatively low-resolution solution. At first I wanted a monocular display as a matter of convenience and simplicity, but after reading up on binocular rivalry I'm now starting to suspect there are neurological/cognitive reasons it would be less efficient.
I've obtained a Vuzix Wrap 920 and Vuzix Wrap VGA Adapter (US$240 combined through Amazon) and removed the cosmetic sunglasses-style lenses to make the rig slightly less obtrusive. This device supports 640x480, 800x600 and 1024x768 resolutions (claimed via EDID on the VGA line) but the native resolution is closer to 640x480 so at first I thought I would stick with that. As it turns out, non-text applications like to make some assumptions about minimum screen geometry (for buttons and the like) which becomes problematic at such low resolutions. Instead, I've set my desktop environment for 1024x768 and increased font sizes where it makes sense to do so.
Single-Board Wearable Computer
At the moment I've got a BeagleBoard-xM running Debian's armhf port. Since the video output is HDMI and there's no inexpensive HDMI-supporting HMD on the market yet (might trade up to a ST1080 eventually), I'm using a High Resolution Video DVI to VGA Converter from StarTech. I've read that a similar (and cheaper) converter from fit-PC2 will work but it requires modifying the BeagleBoard (which I'd like to avoid if I can).
Portable Power Supply and Charger
The single-board wearable is currently powered from an Anker Astro3, but I may switch it to the lighter and slimmer Astro 3E once I don't need as many outputs or as much current. I already had a bunch of suitable switching power supplies on hand (Asus ADP-36EH C, replacements are available for very low cost) so I merely fashioned an appropriate adapter cable to fit the input on the Anker.
Motion-Sensing Pointer
I don't really use a mouse much (I can usually get by with the keynav utility wherever pointer interaction is absolutely required), but there are times when having one would be useful. I'll probably build something USB-based with accelerometers, but might instead do something with a small trackball:


 To the extent possible under law, the creator of this work has waived all copyright and related or neighboring rights to it.